The "Connect the PIM" tutorial
#Step 2 | Generate your credentials
In this step, you are going to generate your credentials. 🚀
Indeed, you will need an API user, a password, a client ID and a secret if you want the connector you just cooked to work. So let's get those credentials!
Best practice
We strongly advise you to create one set of credentials for each of your connectors.
Indeed, it will make your migration to the PIM v4 or newer a lot easier, in case you are looking into it.
#Create an API user
First, we will create an API user for your connector.
Remember, we took an ERP connection for the purpose of this tutorial.
So let's create an API user called myERPuser in the PIM. At the same time, you will be asked for a password: enter myERPuserPassword, for example (or something else more secure! 😉).
Best practice
Always create a dedicated user for each of your connectors.
We also strongly recommend you not to use a real user, as a UI user will never do the same actions as an API user.
#Create an API user role
Then, we are going to create a dedicated user role for your connector. We will name it My ERP connector role, for our tutorial example.
- Click on
System. - Click on
Role. - From here, you should be able to create a role, click on
Create role.
- Once in the role form, give a name to the role you are creating:
My ERP connector role.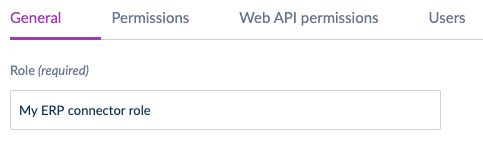
- Go to the
Web API Permissionstab and activate the access to the Web API by clicking onOverall Web API access.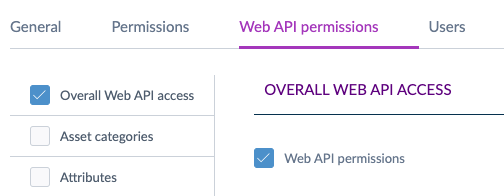
- In the same tab, select the other permissions needed for your connector's API calls to work.
In the case of our ERP example, we don't need to activate other permissions, as the connector will only create products and this permission is already granted by theOverall Web API accessabove. - Click on the
Userstab and tick the box next to themyERPuserto associate your API user to this new role.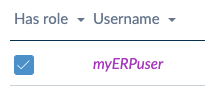
- Click on
Save.
Best practice
Do not - under any condition 😉 - re-use a user role that is already assigned to real users. Indeed, we highly recommend you to create a dedicated user role for each of your connectors.
This way, you can give this user role the specific API permissions needed for your connector to work.
#Get your client ID and secret
Next, you will need to generate a client ID and a secret for your connection.
Best practice
Generate one set of client ID/secret by connector. Indeed, we advise you not to share them between your connectors.
It will simplify the management of these credentials. For example, in case one of the secret leaks, it won't impact all your connectors at once. 😉
Depending on your PIM version (v1.7 or v2/v3), there are two methods to generate your client ID and secret.
If you are using a v2 or V3 PIM, create an API connection.
If you are using a v1.7, launch a command line.
#Create an API connection
We will create an API connection. We will call it ERP for the purpose of this tutorial.
This feature is only available since the 2.0 version. If you are trying to use the API on a 1.7 PIM, please take a look at the second method below.
- Click on
System. - Click on
API connections. - Then on
Create.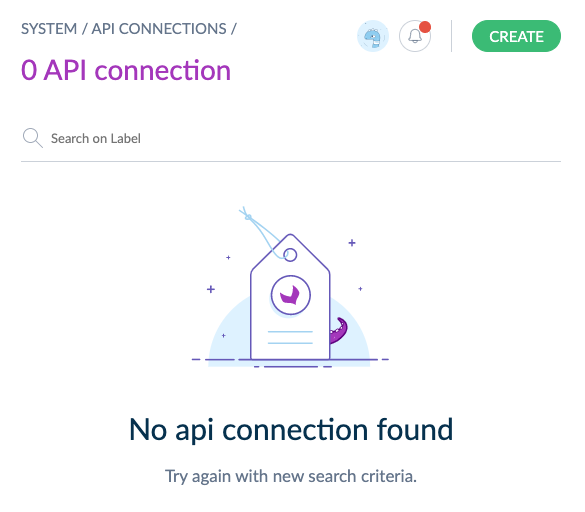 The following popin should be then displayed.
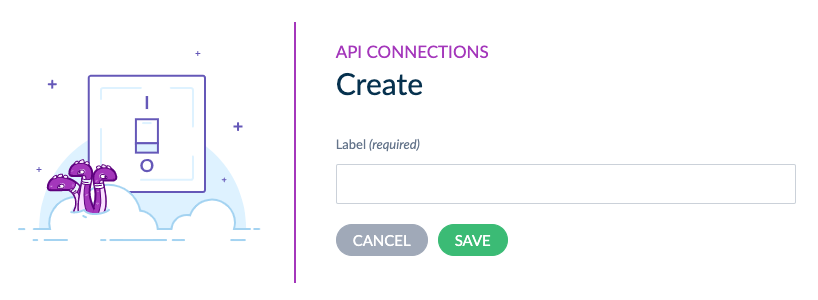
- Enter
ERPin the label field and click onSave.
Your API connection appears in the API connection table and should look like this:
And that's it! 🎉
#Use a command line for the v1.7 PIM only
Use this method only if you are using a v1.7 PIM.
- Launch this command line on your PIM.
php app/console pim:oauth-server:create-client \
        --label="ERP connection"
        --grant_type="password" \
        --grant_type="refresh_token" \
        --env=prod
You will get something like:
A new client has been added:
    client_id: 4gm4rnoizp8gskgkk080ssoo80040g44ksowwgw844k44sc00s
    secret: 5dyvo1z6y34so4ogkgksw88ookoows00cgoc488kcs8wk4c40s
    label: ERP connection
Easy, right? 🙂