#Get your App token
Implement the required parts of the App activation process and receive an App access token for querying your PIM API.
| Use case: |
App Workflow
|

#What you will learn
At the end of this tutorial, you will have bootstrapped an App, received a permanent App access token to your PIM, and be ready for your very first API call with your brand-new token.
If you feel that you need to dig a bit more into the Authentication process, start reading our dedicated guide. By following it you won’t have code snippets but a lot of guidance to implement the whole process.
#Requirements
- You’ve got a PIM developer sandbox. If not, please refer to our App developer starter kit.
#Option 1: Get our Start App
Do you want to quickly start developing? Good news: we have created Start Apps for that purpose! (Pick up your favorite technology and follow the guide).
#Option 2: Build your App with our snippets below
In this section, we explain to you how to build your own App and provide you with snippets.
#Step 1: Expose your activation and callback URLs
First, your application must expose an activation URL.
In our example, we won't do additional steps (like authentication), so we will launch the Authorization Request immediately in this Activation URL.
    // Let's create an `activate.php` file

    $oauthClientId = '<CLIENT_ID>';
    $getAuthorizationUrl = '%s/connect/apps/v1/authorize?%s';
    $scopes = ['read_products', 'write_products', 'delete_products'];

    session_start();

    $pimUrl = $_GET['pim_url'];
    if (empty($pimUrl)) {
        exit('Missing PIM URL in the query');
    }

    // create a random state for preventing cross-site request forgery
    $state = bin2hex(random_bytes(10));

    // Store in the user session the state and the PIM URL
    $_SESSION['oauth2_state'] = $state;
    $_SESSION['pim_url'] = $pimUrl;

    // Build the parameters for the Authorization Request
    // https://datatracker.ietf.org/doc/html/rfc6749#section-4.1.1
    $authorizeUrlParams = http_build_query([
        'response_type' => 'code',
        'client_id' => $oauthClientId,
        'scope' => implode(' ', $scopes),
        'state' => $state,
    ]);

    // Build the url for the Authorization Request using the PIM URL
    $url = sprintf($getAuthorizationUrl, $pimUrl, $authorizeUrlParams);
    header('Location: '.$url);
    exit;
    import express from 'express';
    import crypto from 'crypto';

    const app = express();

    app.get('/activate', (req, res, next) => {
      try {
        const clientId = "AKENEO_CLIENT_ID";
        const scopes = [
          "read_products",
          "read_catalog_structure",
          "read_channel_settings",
          "read_channel_localization",
          "read_attribute_options",
          "read_catalogs",
          "write_catalogs",
          "delete_catalogs",
        ];
        const session = req.session;

        const pimUrl = req.query.pim_url;
        if (!pimUrl) {
          throw new Error(
            "Can't retrieve PIM url, please restart the authorization process."
          );
        }

        // Create a random state for preventing cross-site request forgery
        const state = crypto.randomBytes(64).toString("hex");

        // Store in the user session the state and the PIM URL
        session.state = state;
        session.pim_url = pimUrl;

        // Build the parameters for the Authorization Request
        // https://datatracker.ietf.org/doc/html/rfc6749#section-4.1.1
        const params = new URLSearchParams({
          response_type: "code",
          client_id: clientId,
          scope: scopes.join(" "),
          state: state,
        });

        // Build the url for the Authorization Request using the PIM URL
        const authorizeUrl =
          pimUrl + "/connect/apps/v1/authorize?" + params.toString();

        res.redirect(authorizeUrl);
      } catch (err) {
        next(err);
      }
    });
    import secrets
    from urllib.parse import urljoin

    params # data from your request handling
    storage # your own memory system

    # Retrieve GET query params from your own framework / http handler
    pim_url: str = params.get('pim_url')

    # Retrieve your app's Client ID with your own system
    client_id: str = storage.get("CLIENT_ID")

    # The activate URL should have the pim_url param
    if not pim_url:
        # Return a Bad request response via your own framework / http server
        return response(502, {"message": "Bad request"})

    # Store the PIM url value with your own system
    storage.set("PIM_URL", pim_url)

    # Set the access scopes, take care of the 254 chars max !
    scopes: str = 'read_products write_products'

    # Set a new security state secret and store it with your own system
    state: str = secrets.token_hex(32)
    storage.set("APP_STATE", state)

    # Redirect to the PIM with "connect" options needed
    redirect_url: str = urljoin(
        pim_url,
        f"/connect/apps/v1/authorize"
        f"?response_type=code"
        f"&client_id={client_id}"
        f"&scope={scopes}"
        f"&state={state}",
    )
    # Set the redirection response with your own framework / http server
    return redirect(redirect_url)
    import java.security.SecureRandom;

    import javax.servlet.http.HttpServletRequest;
    import javax.servlet.http.HttpServletResponse;
    import javax.servlet.http.HttpSession;

    import org.apache.tomcat.util.buf.HexUtils;

    import org.springframework.web.bind.annotation.GetMapping;
    import org.springframework.web.bind.annotation.RestController;

    public class App {
        static final String OAUTH_CLIENT_ID = "CLIENT_ID";
        static final String OAUTH_SCOPES = "read_products write_products";

        @GetMapping("/activate")
        public void activate(
                HttpServletRequest request,
                HttpSession session,
                HttpServletResponse response) throws Exception {
            // Create a random state for preventing cross-site request forgery
            byte[] randomBytes = new byte[10];
            new SecureRandom().nextBytes(randomBytes);
            String state = HexUtils.toHexString(randomBytes);

            Object pimUrl = request.getParameter("pim_url");
            if (pimUrl == null) {
                throw new Exception("Missing PIM URL in the query");
            }

            // Store in the user session the state and the PIM URL
            session.setAttribute("oauth2_state", state);
            session.setAttribute("pim_url", pimUrl.toString());

            // Build url for the Authorization Request
            // https://datatracker.ietf.org/doc/html/rfc6749#section-4.1.1
            String authorizeUrl = pimUrl + "/connect/apps/v1/authorize" + "?response_type=code"
                    + "&client_id=" + OAUTH_CLIENT_ID
                    + "&scope=" + OAUTH_SCOPES + "&state=" + state;

            // Redirect the user to the Authorization URL
            response.sendRedirect(authorizeUrl);
        }
    }
Then, your application must expose a callback URL.
    // Let's create a `callback.php` file

    require_once __DIR__ . '/../vendor/autoload.php';

    $oauthClientId = '<CLIENT_ID>';
    $oauthClientSecret = '<CLIENT_SECRET>';
    $generateTokenUrl = '/connect/apps/v1/oauth2/token';

    session_start();

    // We check if the received state is the same as in the session, for security.
    $sessionState = $_SESSION['oauth2_state'] ?? '';
    $state = $_GET['state'] ?? '';
    if (empty($state) || $state !== $sessionState) {
        exit('Invalid state');
    }

    $authorizationCode = $_GET['code'] ?? '';
    if (empty($authorizationCode)) {
        exit('Missing authorization code');
    }

    $pimUrl = $_SESSION['pim_url'] ?? '';
    if (empty($pimUrl)) {
        exit('No PIM url in session');
    }

    // Generate code for token request
    $codeIdentifier = bin2hex(random_bytes(30));
    $codeChallenge = hash('sha256', $codeIdentifier . $oauthClientSecret);

    // Build form data to post
    $accessTokenRequestPayload = [
        'client_id' => $oauthClientId,
        'code_identifier' => $codeIdentifier,
        'code_challenge' => $codeChallenge,
        'code' => $authorizationCode,
        'grant_type' => 'authorization_code',
    ];

    // If you haven't set your client yet, please install Guzzle by following the official documentation:
    // https://docs.guzzlephp.org/en/stable/overview.html#installation
    $client = new GuzzleHttp\Client(['base_uri' => $pimUrl]);

    // Make an authenticated call to the API
    $accessTokenUrl = $pimUrl . $generateTokenUrl;
    $response = $client->post($accessTokenUrl, ['form_params' => $accessTokenRequestPayload]);

    // Convert json response to array
    $contents = json_decode($response->getBody()->getContents(), true);

    // Save token into storage
    storeToken($contents['access_token']);
    import express from 'express';
    import crypto from 'crypto';
    import fetch from 'node-fetch'; // https://www.npmjs.com/package/node-fetch

    const app = express();

    app.get('/callback', async (req, res, next) => {
      try {
        const appClientSecret = "CLIENT_SECRET";
        const appClientId = "CLIENT_ID";

        const session = req.session;

        const pimUrl = session.pim_url;
        const state = req.query.state;
        const authorizationCode = req.query.code;

        if (!pimUrl) {
          throw new Error(
            "Can't retrieve PIM url, please restart the authorization process."
          );
        }

        // We check if the received state is the same as in the session, for security.
        if (!state || state !== session.state) {
          throw new Error("Invalid state");
        }

        if (!authorizationCode) {
          throw new Error("Missing authorization code");
        }

        // Generate code for token request
        const codeidentifier = crypto.randomBytes(64).toString("hex");
        const codeChallenge = crypto
          .createHash("sha256")
          .update(codeidentifier + appClientSecret)
          .digest("hex");

        // Build form data to post
        const accessTokenRequestPayload = new URLSearchParams({
          grant_type: "authorization_code",
          code: authorizationCode,
          client_id: appClientId,
          code_identifier: codeidentifier,
          code_challenge: codeChallenge,
        });

        // Make an authenticated call to the API
        const accessTokenUrl = pimUrl + "/connect/apps/v1/oauth2/token";
        const response = await fetch(accessTokenUrl, {
          method: "post",
          body: accessTokenRequestPayload.toString(),
          headers: {"Content-Type": "application/x-www-form-urlencoded"},
        });

        const result = await response.json();

        const accessToken = result.access_token;

        if (!accessToken) {
            throw new LogicError("Missing access token in response");
        }

        console.log(accessToken);
      } catch (err) {
        next(err);
      }
    });
    import secrets
    import hashlib
    import requests
    from urllib.parse import urljoin

    params # data from your request handling
    storage # your own memory system

    # Retrieve GET query params from your own framework / http handler
    code: str = params.get('pim_url')
    state: str = params.get('pim_url')

    # Retrieve your app's variables with your own system
    pim_url: str = storage.get("PIM_URL")
    app_state: str = storage.get("APP_STATE")
    client_id: str = storage.get("CLIENT_ID")
    client_secret: str = storage.get("CLIENT_SECRET")

    # Control the security state integrity previously defined, to avoid attacks
    if state != app_state:
        return response(403,
            {
                "error": "Forbidden",
                "error_description": "State integrity failed",
            }
        )

    # Generate a new challenge code
    # a sha256 concatenation of a code_identifier and the client_secret
    code_identifier: str = secrets.token_hex(32)
    code_challenge: str = hashlib.sha256(f"{code_identifier}{client_secret}".encode("utf-8")).hexdigest()

    # Send the payload to the PIM instance, ask for an API Token
    data = requests.post(
        urljoin(
            pim_url,
            "/connect/apps/v1/oauth2/token",
        ),
        data={
            "code": code,
            "grant_type": "authorization_code",
            "client_id": client_id,
            "code_identifier": code_identifier,
            "code_challenge": code_challenge,
        },
        headers={
            "Content-Type": "application/x-www-form-urlencoded",
        },
    ).json()

    # Retrieve the fresh token and store it with your own system
    token: str = data.get("access_token")
    storage.set("API_TOKEN", token)

    # Set the redirection response with your own framework / http server
    return redirect("/")
    import java.net.URI;
    import java.net.http.HttpClient;
    import java.net.http.HttpRequest;
    import java.net.http.HttpRequest.BodyPublishers;
    import java.net.http.HttpResponse;
    import java.net.http.HttpResponse.BodyHandlers;
    import java.nio.charset.StandardCharsets;
    import java.security.MessageDigest;
    import java.security.SecureRandom;

    import javax.json.Json;
    import javax.json.JsonObject;
    import javax.servlet.http.HttpServletRequest;
    import javax.servlet.http.HttpSession;

    import org.apache.tomcat.util.buf.HexUtils;
    import org.springframework.web.bind.annotation.GetMapping;

    public class App {
        static final String OAUTH_CLIENT_SECRET = "CLIENT_SECRET";

        @GetMapping("/callback")
        public String callback(
                HttpServletRequest request,
                HttpSession session) throws Exception {
            Object sessionState = session.getAttribute("oauth2_state");
            String stateParam = request.getParameter("state");

            // We check if the received state is the same as in the session, for security.
            if (sessionState == null || !sessionState.equals(stateParam)) {
                throw new Exception("Invalid state");
            }

            Object code = request.getParameter("code");
            if (code == null) {
                throw new Exception("Missing authorization code");
            }

            Object pimUrl = session.getAttribute("pim_url");
            if (pimUrl == null) {
                throw new Exception("No PIM url in session");
            }

            // Generate code challenge
            byte[] randomBytes = new byte[30];
            new SecureRandom().nextBytes(randomBytes);
            String codeIdentifier = HexUtils.toHexString(randomBytes);

            MessageDigest digest = MessageDigest.getInstance("SHA-256");
            byte[] codeChallengeBytes = digest
                    .digest((codeIdentifier + OAUTH_CLIENT_SECRET)
                            .getBytes(StandardCharsets.UTF_8));
            String codeChallenge = HexUtils.toHexString(codeChallengeBytes);

            String accessTokenUrl = pimUrl + "/connect/apps/v1/oauth2/token";

            JsonObject json = Json.createObjectBuilder()
                    .add("client_id", OAUTH_CLIENT_ID)
                    .add("code_identifier", codeIdentifier)
                    .add("code_challenge", codeChallenge)
                    .add("code", code.toString())
                    .add("grant_type", "authorization_code")
                    .build();

            // Do a POST request on the token endpoint
            HttpClient client = HttpClient.newHttpClient();
            HttpRequest authorizeRequest = HttpRequest.newBuilder()
                    .uri(URI.create(accessTokenUrl))
                    .header("Content-Type", "application/json")
                    .POST(BodyPublishers.ofString(json.toString()))
                    .build();

            HttpResponse<String> response = client
                    .send(authorizeRequest, BodyHandlers.ofString());

            return response.body();
        }
    }
You can find more information about the authorization process and code challenge in the following documentation.
#Step 2: Create a tunnel to expose your local App
if you use a local version of PIM, skip this step
Use ngrok to create a tunnel that allows your App to be accessed using a unique HTTPS URL. You need to create an ngrok account and set up it.
ngrok http 8000
If everything goes well the command will output your public URL for your local App:

#Step 3: Declare your local App as a custom App in your sandbox to generate credentials
To get credentials for your app, you need to create a custom App on your developer sandbox.
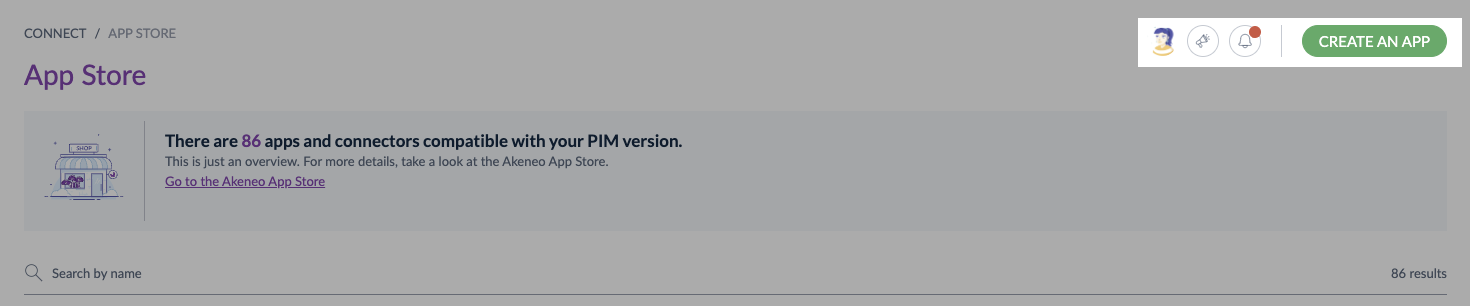
First of all, go to Connect, then App Store
#Permissions
If you see Create an App skip to Connect app, else please update your role permissions.
To do so, you need to:
- Go to
System, thenRoles - Choose the role you use for your user
- In the
Permissionstab, scroll down and search for theConnectsubmenu - Select
Create and delete custom apps - Don't forget to save your modifications
#Connect app
To create a Custom App:
- In the top right corner, click on
Create an App - Fill in all the required information
Activate URL: [your-ngrok-url]/activate
Callback: [your-ngrok-url]/callback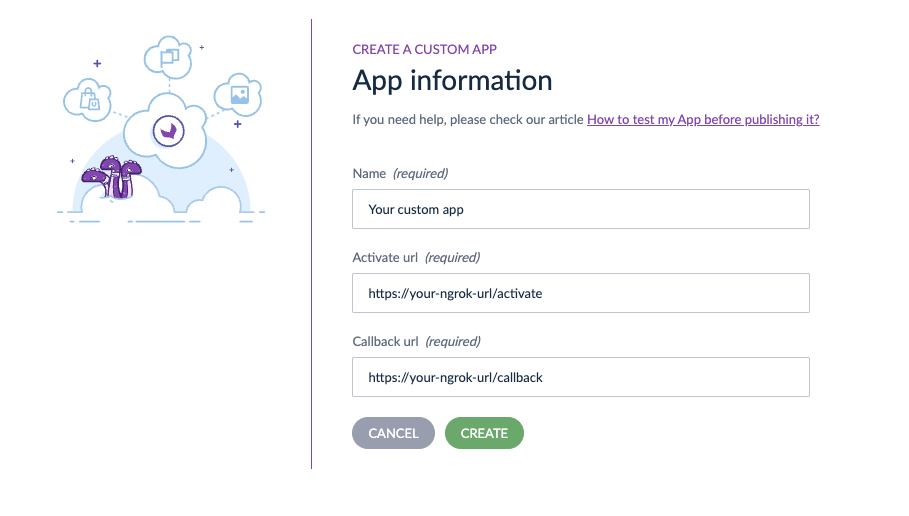
- Then click on
Create - Copy/paste credentials in your app configuration file
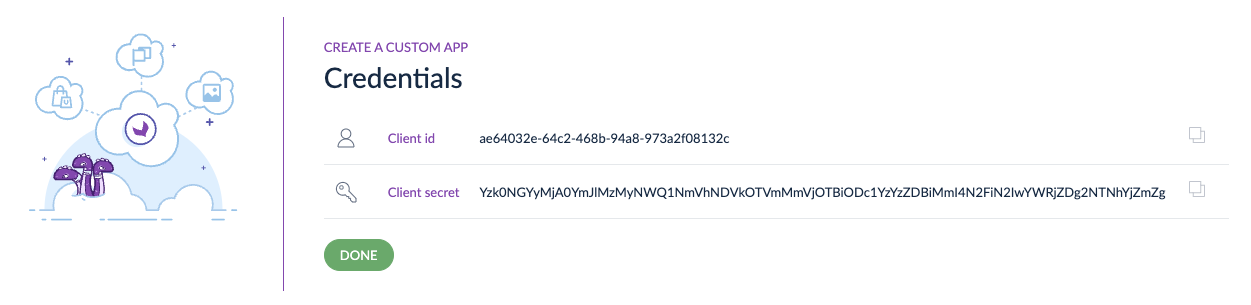
- And click on
Done - Your custom App appears on the App Store page
#Step 4: Run your local App
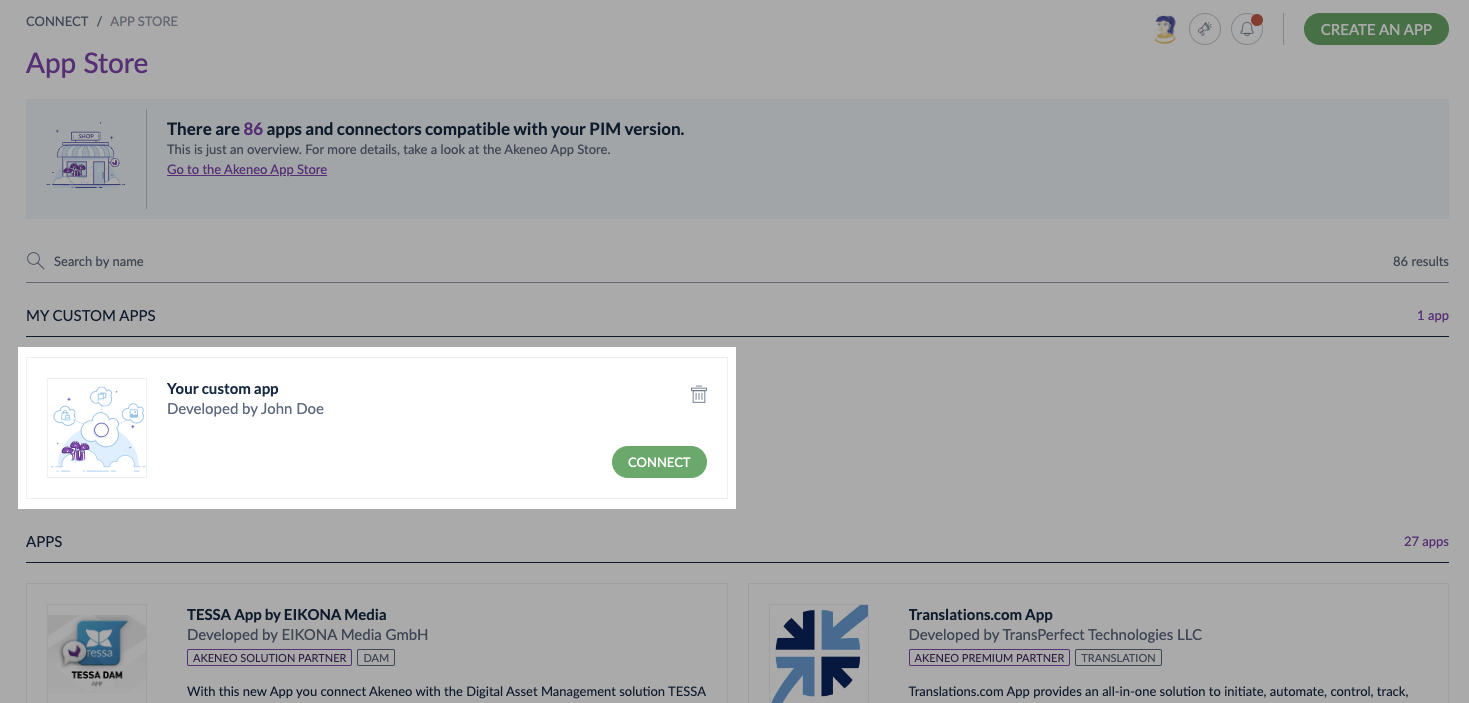
Connecting a Custom App is like connecting a Published App.
- Launch your APP
- Click on
Connect - Your App opens in a new tab of your browser
- Launch the connection process from your App
- Follow all the activation process steps, then
Confirm - Your custom App is now connected with Akeneo PIM! 🔗
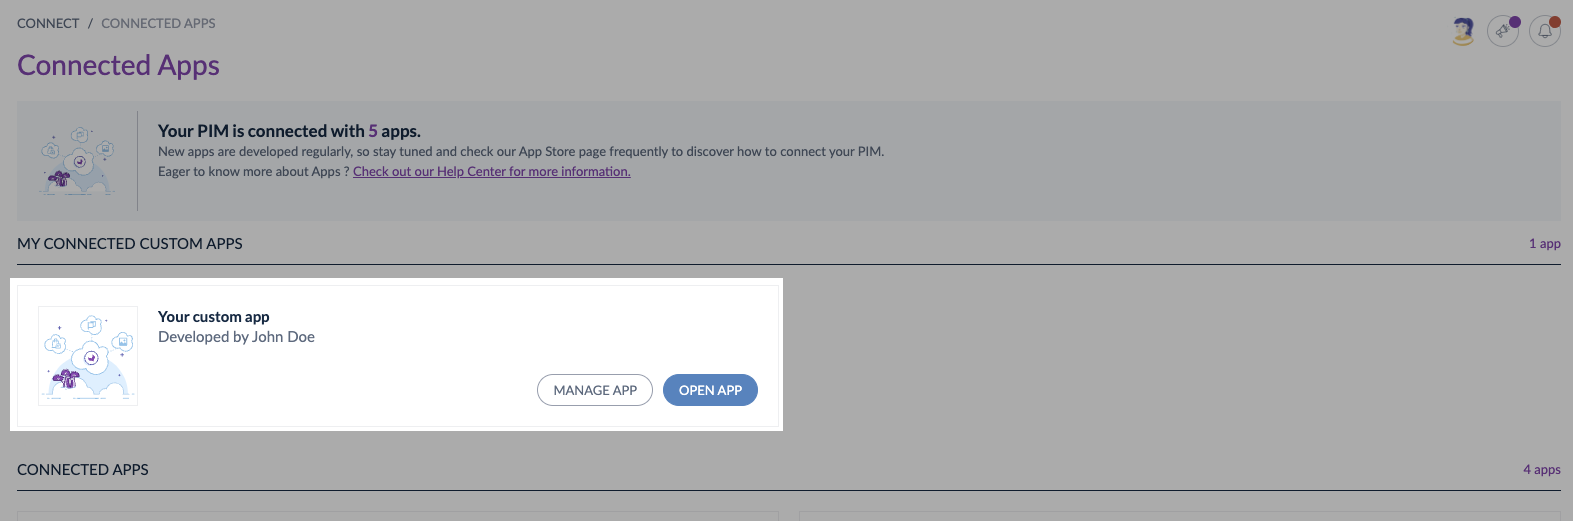
Now that your App is connected, you can enjoy all the available App features from Akeneo Product Cloud UI and test that your App works well.
To access the settings of your connected App on Akeneo PIM, please go to Connected Apps, then click on Manage App.
You can also open your App from Akeneo PIM UI, to do so, click on Open app.
To know more about the step-by-step activation process, please read our article:
How to connect an App?
#Step 5: Use your access token to call the API
At the end of this process, you receive the following response with an access_token:
var_export
    {
      "access_token": "Y2YyYjM1ZjMyMmZlZmE5Yzg0OTNiYjRjvar_exportZTJjNjk0ZTUxYTE0NWI5Zm",
      "token_type": "bearer",
      "scope": "read_products write_products"
    }
You can use this token to call the Akeneo PIM REST API.