Quick start my first webhook Deprecated
#Step 1 | Receive my first set of data
Here, you will connect an event subscription to a fake endpoint and receive your first data. 🚀
When testing your app, we advise you to check our Constraints on IP addresses and use Webhook.site or a comparable tool instead.
#Create a test URL on Webhook.site
Webhook.site allows you to easily inspect, test and run scripts and workflows for any incoming HTTP request. Go to Webhook.site to create a test URL and if needed change the configuration to respond with a 200 status.
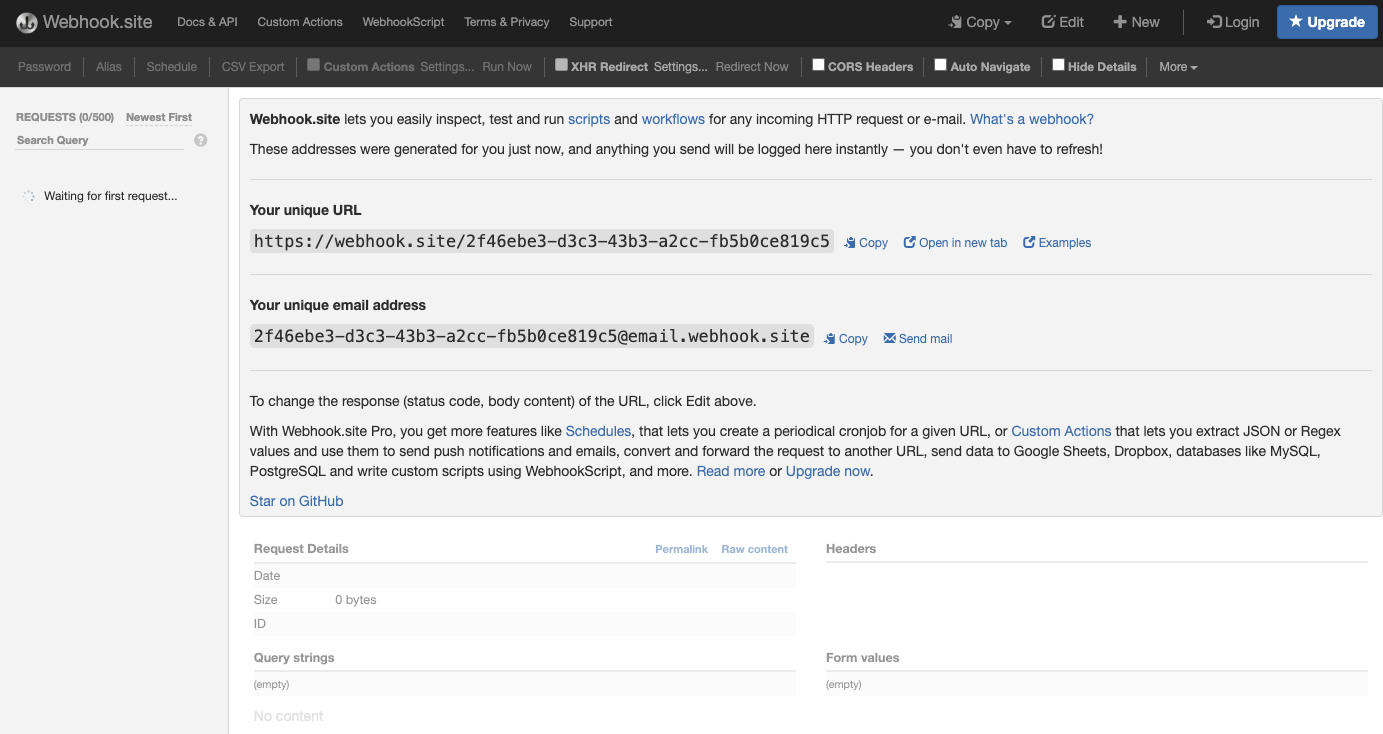
Alright! You are ready to receive our first piece of data from PIM webhooks.
#Send data to your test URL
Now, log into your 5.0 or SaaS Akeneo PIM then go to the Event subscriptions page of the connection you created before.
Fill in the URL field with the URL of your test URL and click Test.
To access your connection settings, click Connect, then Connection settings.
Don't forget to save your configuration before leaving the page.
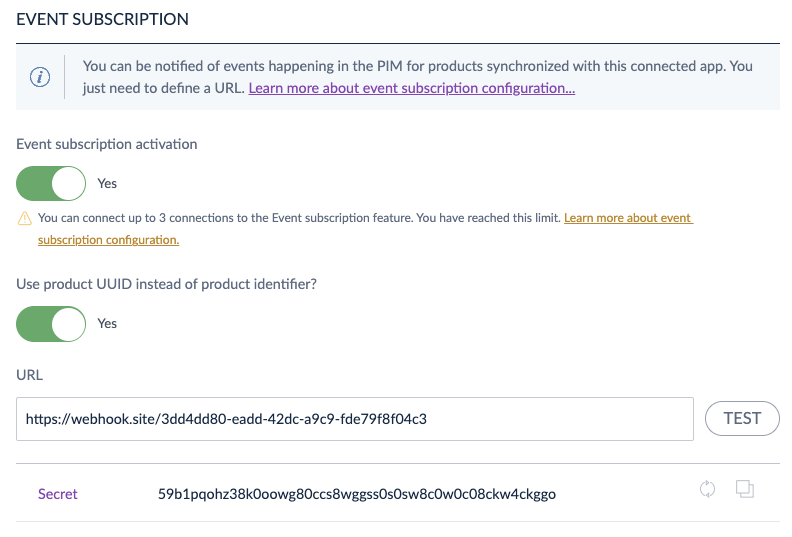
You should see that the response is 200! 🎉
#Receive data
Go back to your Webhook.site history, refresh it and let's see how the magic happens! You are going to be amazed by the first piece of data you just received. Click on details and tada 🎉
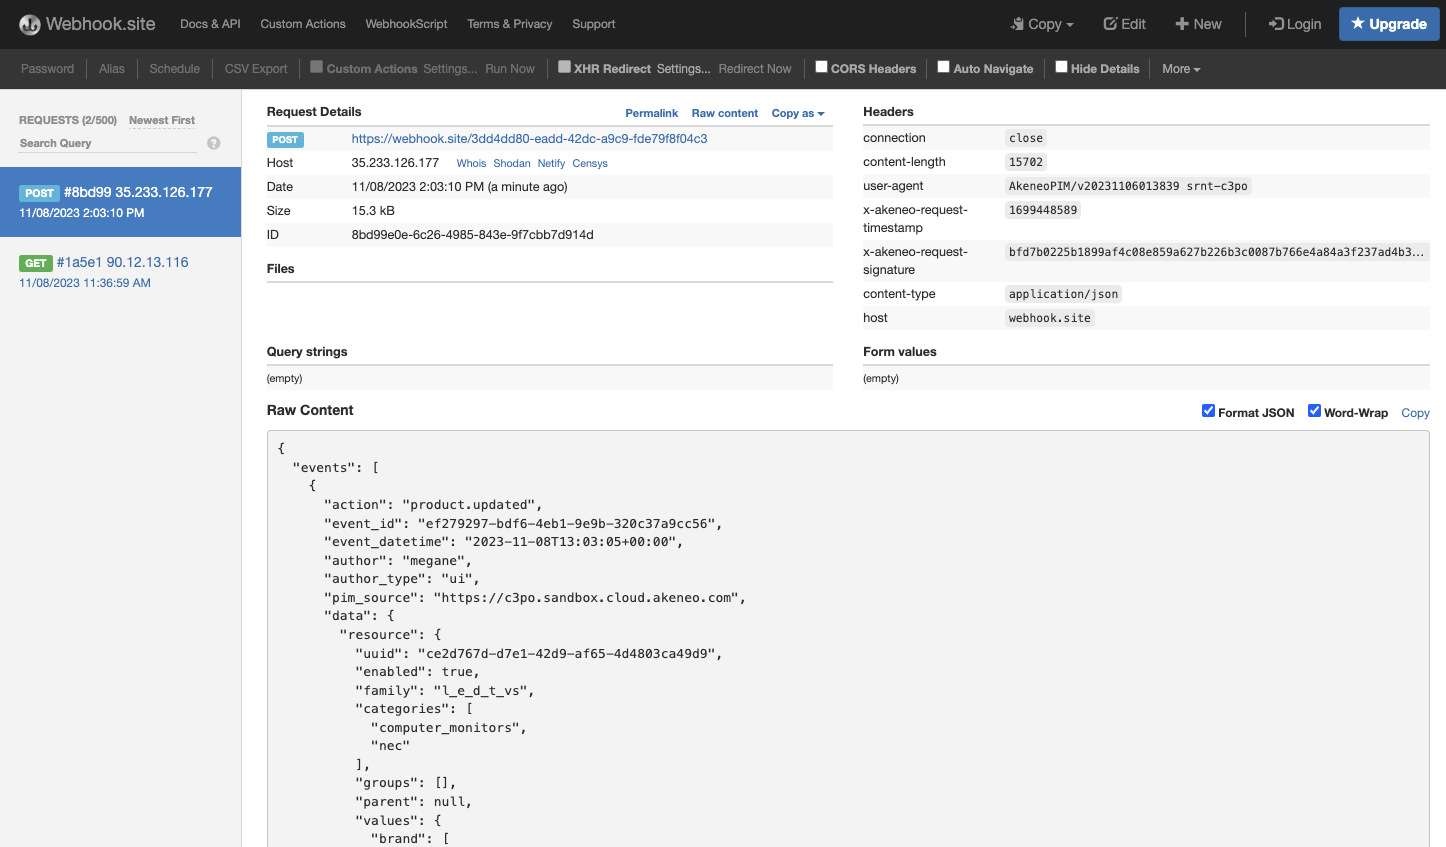
Now you can play with the API and update a product to receive the event in your Webhook.site! If you don't know how to run an API call follow this guide: Your first tutorial.
If you're in a SaaS or a Flexibility environment, your server is correctly configured by us. 🚀 So it must be a permission problem!
If you are on an Enterprise Edition, you may want to take a look at your permissions. To do so, follow check out our What is an event subscription? page to find out more about the configuration.
If it's not a permission issue, you may want to make sure your server is able to send data. You can check by using a curl on your test URL from your server.