The REST API basics
#Permissions
This documentation concerns Connector development only.
If you develop an App please consult this documentation instead.
Want to know the differences between an App and Connector? Please consult this documentation.
In some connector use cases, you will need to restrict the access to the REST API. There are two ways to handle this in the REST API, depending on the wanted result:
- if you want to restrict the access to some REST API endpoints, use the ACLs authorizations.
- if you want to restrict the access to certain parts of your product catalog, use the Entreprise Edition permissions (only available in the Entreprise Edition).
Please see below for more details about both permission systems.
Before diving into those sections, here is one key piece of information you need: those permissions are enforced thanks to the API user you use whenever you ask for a token. All the REST API calls launched with the generated token afterwards will then benefit from the permissions defined by the user group and the user role of this API user.
In other words, you will need to define for your API user:
- a role, if you want to use the ACLs permissions,
- and a group if you want to use the EE permissions.
Can't remember how to get this API user? See here to find out how!
#Endpoint access restrictions
Like when using the PIM through the UI, we use ACLs to define which endpoint a connection can or cannot use.
Here are the simple steps to follow to configure those permissions.
- Log into your favorite PIM.
- Navigate to the
System/Rolesmenu. - Click on
Create role. - Input a new name for the user role you are creating,
ERP connection user rolefor example. - In the
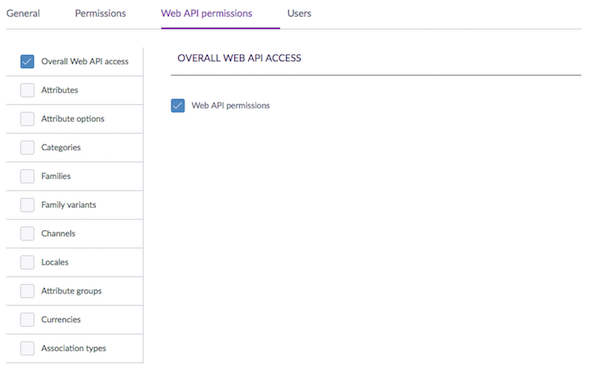
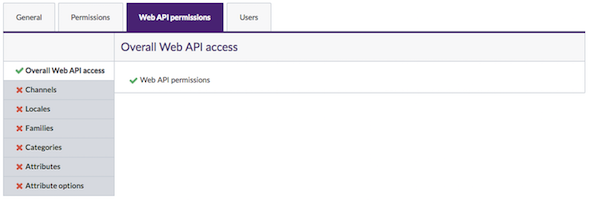
Userstab, select the API user you created earlier. - In the
Web API permissionstab, select the permissions you want to give to your API user.
We strongly recommend you to create dedicated user roles for your API users, different from the user roles that you use for your UI users. So go ahead and create one user role for every API connection you will need.
Grant UI permissions to your API user roles doesn't make sense. Your API user should never be used to access the PIM UI.
#Overall access
The first ACL Overall Web API access means that if enabled, each user under that role will have access to the REST API.
You will need to give at least this ACL to all the API user roles you created before for them to be able to call the REST API.
For more security, we introduced the following ACLs from version 6.0 and for our SaaS customers:
- on products:
- Create and update products
- List products
- Delete products
- on assets and asset families:
- List assets,
- Create and update assets
- Delete assets
- List asset families
- Create and update asset families
- on reference entities and records:
- List reference entity records
- Create and update reference entity records
- Delete reference entity records
- List reference entities
- List reference entities`
Until the 5.0 version, users with Overall Web API were able to make requests on products, product models, asset families, assets, reference entities, and records without additional permissions.
In the Enterprise Edition, the Catalog Permissions are applied in addition to those ACLs.
#Catalog structure access
You can fine-tune even more this permission by restricting or allowing access to the entities of the catalog structure (categories, families, attributes, attribute options, channels and locales). The tables below list all the ACLs available.
| Permission name | If enabled, you will be able to |
|---|---|
| List categories | GET on /categories* |
| Create and update categories | POST and PATCH on /categories* |
| List families | GET on /families* |
| Create and update families | POST and PATCH on /families* |
| List family variants (2.x only) | GET on /families/{family_code}/variants* |
| Create and update family variants (2.x only) | POST and PATCH on /families/{family_code}/variants* |
| List attributes | GET on /attributes* |
| Create and update attributes | POST and PATCH on /attributes* |
| List attribute options | GET on /attributes/{attribute_code}/options* |
| Create and update attribute options | POST and PATCH on /attributes/{attribute_code}/options* |
| List attribute group (2.x only) | GET on /attribute-groups* |
| Create and update attribute groups (2.x only) | POST and PATCH on /attribute-groups* |
| List association types (2.x only) | GET on /association-types* |
| Create and update association types (2.x only) | POST and PATCH on /association-types* |
| List channels | GET on /channels* |
| Create and update channels (2.x only) | POST and PATCH on /channels* |
| List locales | GET on /locales* |
| List currencies (2.x only) | GET on /currencies* |
For more security, we introduced the following ACLs from version 6.0 and for our SaaS customers:
| Permission name | If enabled, you will be able to |
|---|---|
| List products | GET on /products* and /product-models* |
| Create and update products | POST and PATCH on /products* and /product-models* |
| Delete products | DELETE on /products/{code}, and /product-models/{code} |
| List asset families EE | GET on /asset-families, on /asset-families/{code}, and on /asset-families/{code}/attributes* |
| Create and update asset families EE | PATCH on /asset-families, on /asset-families/{code}, and on /asset-families/{code}/attributes* |
| List assets EE | GET on /asset-families/{code}/assets* and on /asset-media-files/{code} |
| Create and update assets EE | POST and PATCH /asset-families/{code}/assets* and on /asset-media-files/{code} |
| Delete assets EE | DELETE on /asset-families/{code}/assets/{code} |
| List reference entity records EE | GET on reference-entities/{code}/records* and on reference-entities-media-files/{code} |
| Create and update reference entity records EE | POST and PATCH on reference-entities/{code}/records* and on reference-entities-media-files |
| List reference entities EE | GET on reference-entities, on reference-entities/{code}, and on reference-entities/{code}/attributes* |
| Create and update reference entities EE | PATCH on reference-entities/{code} and on reference-entities/{code}/attributes/{code}* |
#Catalog permissions (EE only)
The Entreprise Edition permissions based on the user groups are also enforced in the API.
Those permissions are really powerful and make it possible to create great workflows around product enrichment with the REST API. There are 3 ways to benefit from those permissions. They are detailed in the following sections.
Those permissions were introduced in the REST API starting from the 2.0 version.
Permissions described here apply to all product types: products, product models, and published products.
#Hide a part of your catalog
With these powerful permissions, you can hide a whole part of your product catalog. It is their very first power.
The EE permissions can be based on three different levels:
- you can hide products that are inside one or several given categories,
- you can hide the product information of the attributes that are inside one or several given attribute groups,
- you can hide the translated product information of one or several given locales.
It can be very useful if:
- you don't want your third party-connector to mess up with this part of the product catalog.
For example, you have products created in the PIM coming from your ERP and you want them to be created only in yourERPcategory tree. You can use the EE permissions to hide the other trees from your connector, this way, it will only be able to create products in theERPtree. - you don't want your third-party connector to be aware of this part of the product catalog.
For example, you are a reseller and you provide an API connection to one of your suppliers for them to push its product data into the PIM. But you don't want them to be able to access or erase any data that does not involve their products. In this case, you can give them restricted access to the category containing his products, and not to the other suppliers' categories. Pretty neat, right?
To enable these powers:
- Log into your favorite PIM and navigate to the
System/User groupsmenu. - Click on
Create groupand input a new name for the user group you are creating,ERP connection user groupfor example.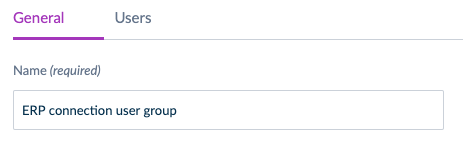
- In the
Userstab, select the API user you created earlier.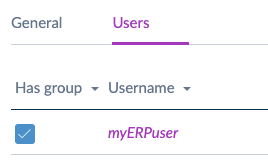
- Then, navigate to the
Settings/Categoriesmenu, if you want to benefit from permissions on categories, otherwise jump to step 9. - For each category you want to hide from your REST API calls, enter the
Permissionstab. - Remove the group you just created from the
Allowed to view products,Allowed to edit productsandAllowed to own productsinputs. Don't forget to click onSave.
- Then, navigate to the
Settings/Localesmenu, if you want to benefit from permissions on locales, otherwise jump to step 10. - For each locale you want to hide from your REST API calls, enter the
Permissionstab. - Remove the group you just created from the
Allowed to view informationandAllowed to edit informationinputs. Don't forget to click onSave. - Then, navigate to the
Settings/Attribute groupsmenu. - For each locale you want to hide from your REST API calls, enter the
Permissionstab. - Remove the group you just created from the
Allowed to view attributesandAllowed to edit attributesinputs. Don't forget to click onSave.
That's it! 🎉
Don't hesitate to test your configuration by calling the GET product endpoint on a product.
If this product is classified only inside the categories you hide, you should receive a 404, meaning that your configuration worked. 🙂
If you hide a locale, you won't be able to receive the values of the given locale. Check the product body of the answer!
If you hide a whole attribute group, you won't be able to receive the values of the attributes that are inside this attribute group. Marvelous!
Note you also won't be able to call any PATCH or POST endpoints on the products you hide thanks to categories.
#Read-only mode on your catalog
The same way you can hide a part of your product catalog, you can also only give a view right to your API user, disabling the right to update products.
This can be pretty useful whenever you only want to share your catalog in a read-only mode. 😉
To enable this possibility:
- Log into your favorite PIM.
- Navigate to the
System/User groupsmenu. - Click on
Create group. - Input a new name for the user group you are creating,
ERP connection user groupfor example. - In the
Userstab, select the API user you created earlier. - Then, navigate to the
Settings/Categoriesmenu. - For each category you wish to put in read-only mode, enter the
Permissionstab. - Add the group you just created into the
Allowed to view productsinput. - If your user group is already set into the
Allowed to own productsandAllowed to edit productsinputs, remove it.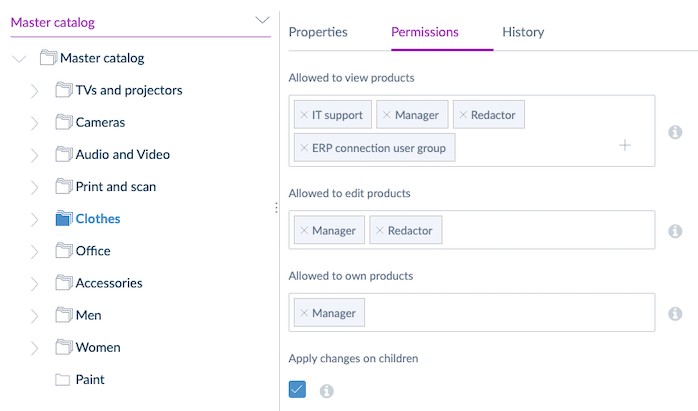
- Don't forget to click on
Save.
That's it! 🎉
Don't hesitate to test your configuration by calling the PATCH product endpoint with an update in the body of your product. You should receive a 403, saying that you don't have the right update for this product, exactly the expected behavior!
#Proposals of product information updates
The second power of these permissions is that for some given categories, you can define that the PATCH REST API endpoints will only be able to suggest modifications on your product values, instead of automatically updating them.
Your PIM users will then be able to validate or reject them directly in the PIM UI. This is perfect if you want to easily control the product information that is pushed into your product catalog. 😉
To enable this possibility:
- Log into your favorite PIM.
- Navigate to the
System/User groupsmenu. - Click on
Create group. - Input a new name for the user group you are creating,
ERP connection user groupfor example. - In the
Userstab, select the API user you created earlier. - Then, navigate to the
Settings/Categoriesmenu. - For each category you wish to only create proposals, enter the
Permissionstab. - Add the group you just created into the
Allowed to view productsandAllowed to edit productsinputs. - If your user group is already set into the
Allowed to own productsinput, remove it.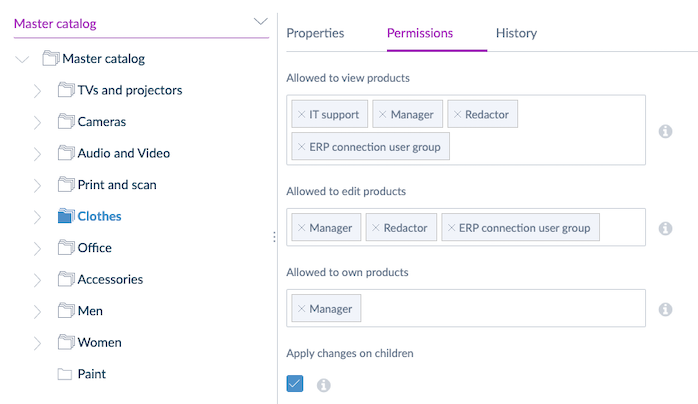
- Don't forget to click on
Save.
That's it! 🎉
Don't hesitate to test your configuration by calling the PATCH product endpoint with an update in the body of your product. A draft of your product will be created.
You will then need to send your draft for approval by using this REST API endpoint.
If it works correctly, the owners of the categories where this product is classified will receive a new proposal in their Proposals screen. Below, you can see an example of the generated proposal.
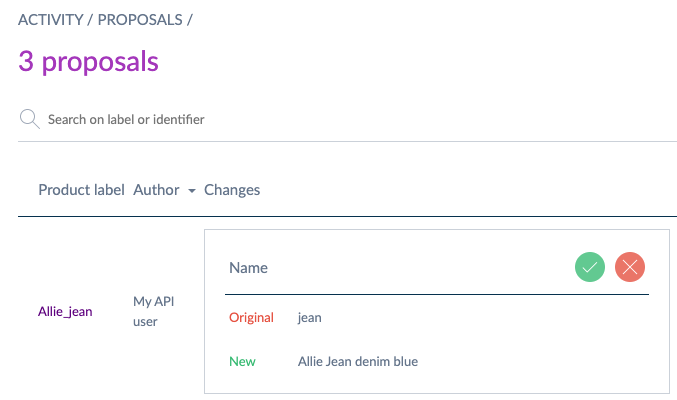
Proposals can be created only on product updates, not on product creations. 😉
Having trouble creating proposals on one given product?
As soon as your product is at least owned in one category by your API user group, the REST API will directly apply the updates, instead of creating a draft and then a proposal.
So make sure your product is only classified in categories that are not owned by your API user group.